
How to Make an AI Zombie Video From Two Photos
How to make an AI zombie video from two photos: assign the survivor and zombie, choose a format, check the cabin-to-memory cut, and download your clip.
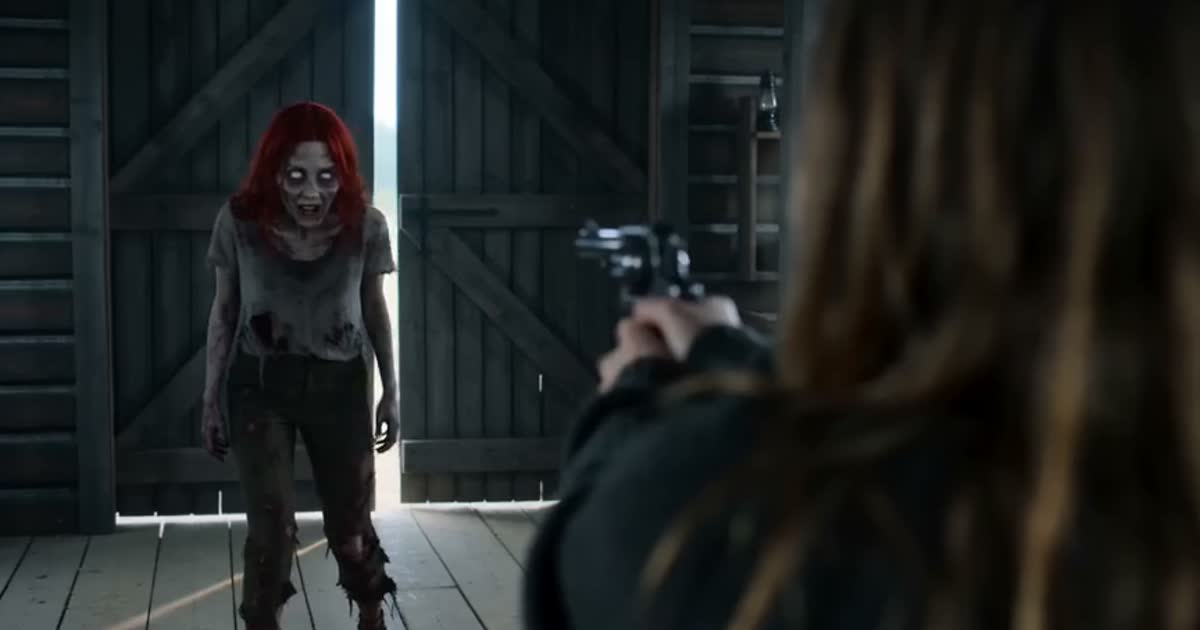
To learn how to make an AI zombie video, start with two clear portraits: one person will hold the gun, and the other will become the zombie. Add them to the matching slots in the AI zombie video generator, choose your resolution and aspect ratio, then generate the clip. The result is a 15-second film with sound: a tense cabin scene ends in a leap that becomes a hug in a sunny field.
The frames in this guide come from our own sample video, made with fictional AI characters. They show what the two roles and the scene change look like before you upload anyone's photo.
How to make an AI zombie video in four steps
- Choose the two people. Pick a clear, front-facing photo for each person. The first slot, “Holds the gun,” is the survivor. The second, “Turns into a zombie,” is the person who appears as a zombie in the cabin and healthy again in the memory scene. Ask the other person before uploading their image.
- Check the crops. Use photos with the full face visible, even lighting, and one main subject. Avoid sunglasses, heavy filters, tiny faces, or a second person in the same crop. You do not need to pose together or take a new picture inside a cabin; the generator builds those scenes.
- Choose quality and shape. Select 480p or 720p, then 16:9 for a wide video or 9:16 for a vertical post. The pricing page shows the current credit cost before you start. The shape changes the frame, not the story or the number of people.
- Generate and inspect. Sign in, confirm you have permission to use the photos, and start the video. When rendering finishes, open it in My videos. Check both faces, the action in the cabin, the transition to the field, and the sound before downloading or posting it.
You can watch the finished couple and pet examples before choosing photos. The couple mode is the simplest place to start if you want two people in the video.
What the finished zombie video should show
The first part of the video is an old wooden cabin. The survivor is frightened and holds a gun, while the other person approaches with pale skin and cloudy eyes. The survivor lowers the gun and opens their arms. The zombie runs and leaps; the next scene carries that movement into a hug in a sunlit wheat field. The person who was a zombie now looks alive again.
These two frames show why the role order matters. In the cabin, the zombie is the threat. In the field, that same character is the person the survivor remembers. If you swap the uploaded photos, you change the emotional point of view of the entire video.
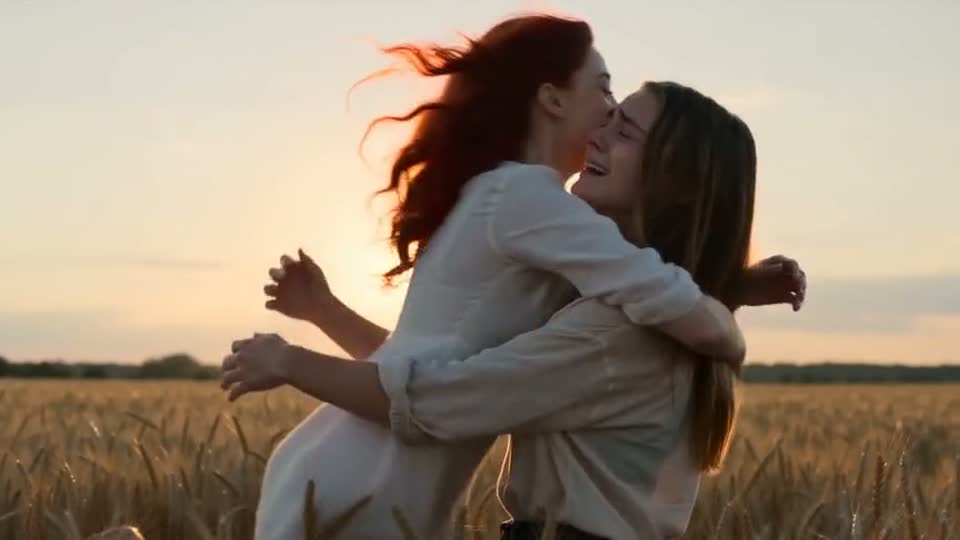
This is a generated scene, not a face filter applied to one still photo. The tool uses both portraits as character references and generates the cabin, action, memory, and soundtrack. Its prompt follows the shot order of the trend; you do not have to write a prompt or edit several clips together.
Choose the right photos for the video
The faces do most of the work in a short video. A small face, a strong beauty filter, or a side profile gives the model less to work with. For a first attempt, pick ordinary portraits in which each person is looking toward the camera. Different backgrounds are fine because the video uses the faces and bodies, not the backgrounds of the source photos.
| Photo choice | What to expect in the video | Better choice |
|---|---|---|
| Two people in one photo | The tool has to guess which face belongs to a role | One clear portrait per slot |
| Face hidden by sunglasses or hair | Less visible detail for facial likeness | Uncovered face in even light |
| Distant full-body picture | Face may be too small for close-ups | Head-and-shoulders portrait |
| Heavy filter or stylized avatar | The filter can carry into the video | Natural photo with visible features |
The generator accepts JPEG, PNG, and WebP images up to 8 MB each. It does not require a particular gender for either role. For a dog or cat instead of a second person, use the pet generator, which uses a different character prompt.
How to check and improve your AI zombie video
Watch the complete video once before sharing. Look at the survivor's face in the close-up, the zombie's face when it appears, the moment the gun comes down, and the jump into the field. Then listen to the sound. The video should move from cabin ambience to a softer memory scene. Generated details vary from run to run, so inspect the actual file rather than assuming the sample predicts every frame.
If a face looks unlike the photo, try a sharper, more direct portrait for that role. If the memory cut is hard to read, replay the middle of the video before deciding whether to make another one. A new generation is a new video; it is not a frame-by-frame repair of the first file. If the generation itself fails, the site's credits are returned automatically. The examples page lets you compare the expected story beats with your result.
Choose 16:9 if you want the wide cabin and field compositions shown here. Choose 9:16 if the video will fill a phone screen. You can add your own caption or platform sound after downloading, but review the generated audio first so it does not clash with what you add.
Before you post
Tell viewers that the video is AI-generated, especially if the faces belong to real people. Get permission from everyone whose photo you use. The fictional portraits in this guide are site-created sample characters; no customer video or customer photo appears here.
Now that you know how to make an AI zombie video, open the generator, place each portrait in the correct role, and use the finished sample as a visual checklist for your own clip.